
How to Machine Sew Hexagons Together
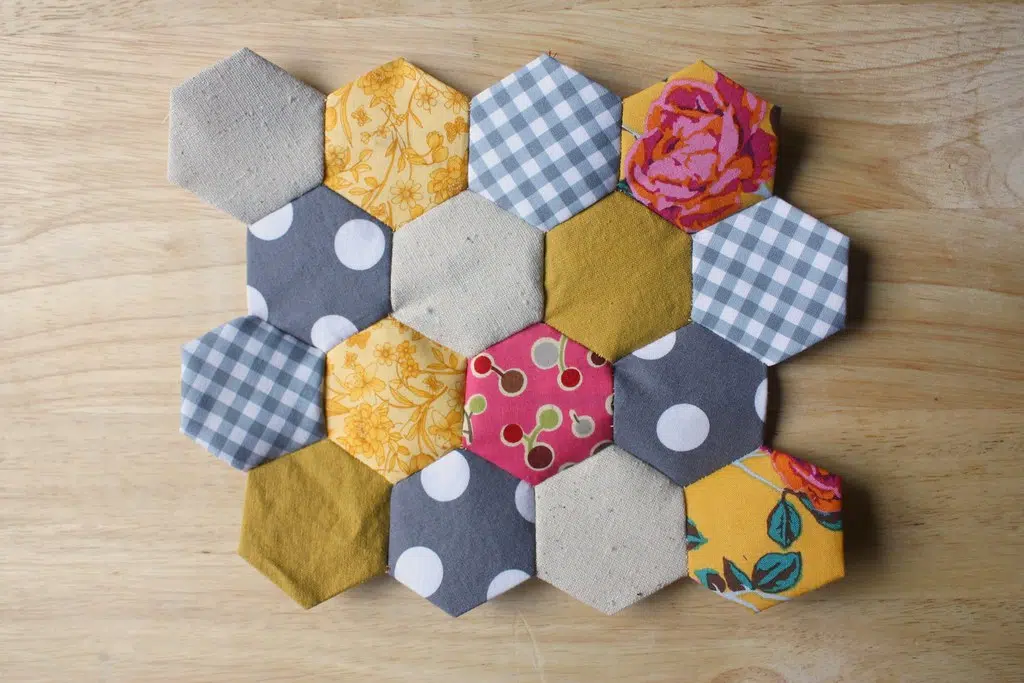
Sewing hexagons together is a fun and creative way to make a unique and beautiful quilt. While hand sewing hexagons is a popular technique, using a sewing machine can save time and make the process easier. Machine sewing hexagons together requires some basic sewing skills and attention to detail, but the end result is well worth the effort. In this tutorial, we will provide a detailed outline on how to machine sew hexagons together, from preparing the hexagon templates to finishing the quilt. So, gather your materials and let’s get started!
Materials Needed
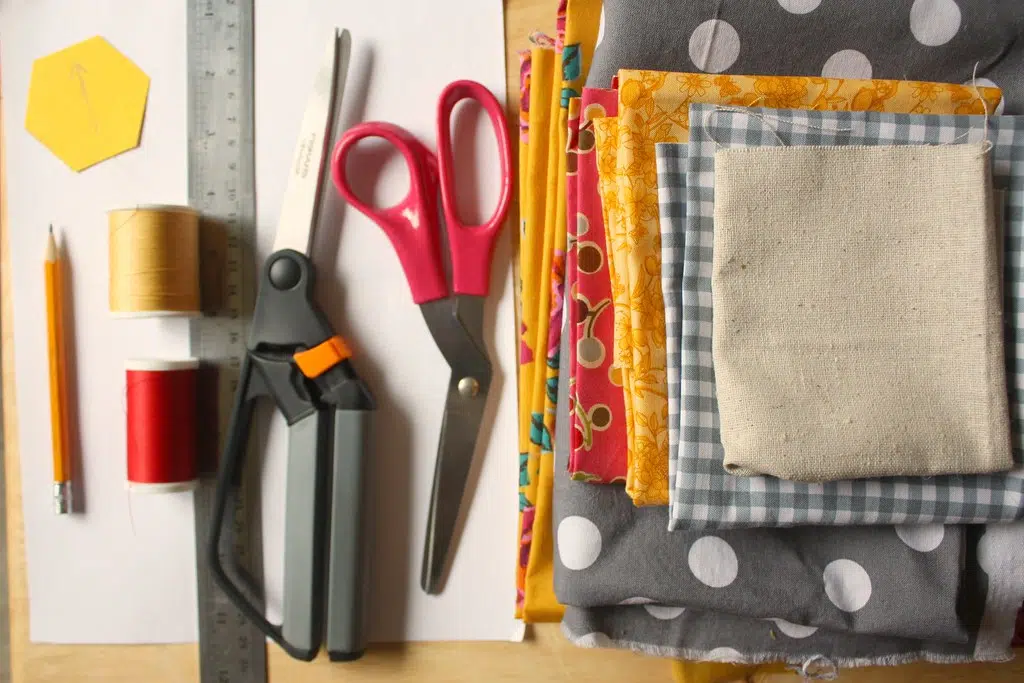
Hexagon paper templates
Hexagon paper templates are used to create hexagon shapes that are uniform in size and shape. You can find these templates online or purchase them from a craft or sewing store. The size of the hexagon template will depend on the size of the finished quilt you want to make.
Fabric
Fabric is the material used to create the hexagons. Choose fabrics that complement each other or follow a specific colour scheme. You can use a variety of fabrics, including cotton, flannel, or even silk. Make sure to wash and iron your fabric before cutting out your hexagons to prevent any shrinkage or distortion.
Sewing machine
A sewing machine is needed to stitch the hexagons together. A basic sewing machine will do the job, but make sure it is in good working condition before you start. Check that the needle is sharp and that the tension is set correctly.
Thread
Thread is used to sew the hexagons together. Choose a thread color that matches or complements the fabric you are using. Make sure to use high-quality thread that won’t break easily.
Scissors
Scissors are needed to cut out the hexagon templates and the fabric. Use sharp fabric scissors to ensure clean and accurate cuts.
Iron
An iron is used to press the seams of the hexagons. A hot iron is necessary to create crisp seams and flatten the fabric. Make sure to use a pressing cloth when ironing delicate fabrics to prevent damage.
By gathering these materials, you’ll have everything you need to start machine sewing hexagons together and creating a beautiful quilt.
Step 1:
Prepare the hexagon templates
To begin machine sewing hexagons together, you’ll need to prepare your hexagon templates. Here’s how to do it:
Print or trace hexagon templates onto paper:
Find a hexagon template online that matches the size you want for your finished quilt. You can also draw your own hexagon shapes by using a ruler or a hexagon template. Trace or print out as many hexagons as you need for your quilt design.
Cut out the hexagon templates:
Use scissors to cut out the hexagon templates along the traced or printed lines. Make sure to cut accurately and smoothly, as this will affect the overall quality of your quilt. These paper hexagon templates will be used to create the fabric hexagons later on.
By preparing your hexagon templates carefully, you’ll be ready to move on to the next step of the process: cutting the fabric into hexagons.
Step 2:
Cut fabric into hexagons
Once you have your hexagon templates ready, it’s time to cut your fabric into hexagons.
Follow these steps:
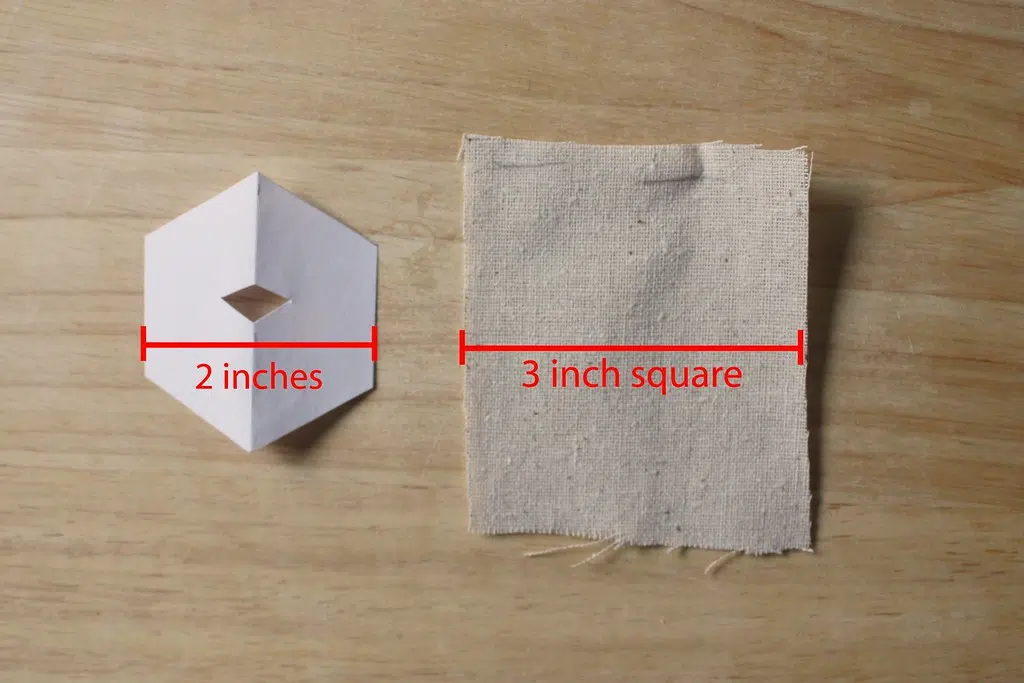
- Place the hexagon template onto the wrong side of the fabric and use a fabric pen or pencil to trace around it. Repeat this step until you have traced as many hexagons as you need for your quilt design.
- Cut out fabric hexagons, leaving a 1/4 inch seam allowance around each hexagon. Use fabric scissors to cut out the fabric hexagons, leaving a 1/4 inch seam allowance around each hexagon. This seam allowance will allow you to sew the hexagons together later on. Make sure to cut accurately and smoothly, as this will affect the overall quality of your quilt.
By cutting the fabric into hexagons using the templates, you’ll have uniform shapes that will fit together seamlessly when you start to sew them together.
Step 3:
Pin hexagons together
After cutting your fabric hexagons, it’s time to start sewing them together. Here’s how to pin the hexagons together:
- Take two hexagons and place them right sides together, with the wrong sides facing out.
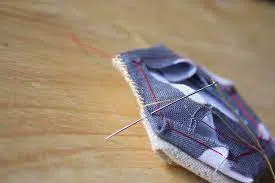
- Pin along one edge of the hexagons, making sure the corners and edges match up
- Starting at one edge of the hexagons, use sewing pins to hold the hexagons together, making sure the corners and edges match up precisely. Pinning every few centimetres will help keep the fabric in place and prevent any shifting as you sew.
- Continue to pin the hexagons together until all sides are pinned
- Pin along all sides of the hexagons until they are completely pinned together. Repeat this process with additional hexagons until you have a cluster of hexagons that will form one section of your quilt.
By pinning the hexagons together carefully and accurately, you’ll be ready to move on to the next step: sewing the hexagons together using a sewing machine.
Step 4:
Sew hexagons together

When sewing hexagons together, it’s important to start at one point and sew to the next point. Here are the steps for sewing hexagons together:
- Place two hexagons right sides together, with one point of each hexagon aligned.
- Pin the two hexagons together along the edge where the points meet, making sure the edges and corners are aligned.
- Sew along the pinned edge using a sewing machine, using a 1/4 inch seam allowance.
- Backstitch at the beginning and end of each seam to secure the stitches.
- Repeat the process, sewing each point of the hexagons together until all sides are sewn.
It’s important to be precise when sewing hexagons together, as any inaccuracies can affect the overall pattern and shape of the quilt. Take your time, use pins to keep the fabric in place, and double-check that the edges and corners are aligned before sewing.
Step 5:
Remove paper templates
After sewing the hexagons together, it’s time to remove the paper templates. Here are the steps for removing the paper templates:
- Gently fold back one edge of the fabric from each hexagon to expose the paper template.
- Use a pair of scissors to make a small snip in the paper template, being careful not to cut the fabric.
- Gently pull the paper template out of the hexagon, starting at the snipped edge.
- Continue to remove the paper templates from each hexagon until they are all removed.
- If there are any small bits of paper left behind, use a pair of tweezers to gently remove them.
It’s important to remove the paper templates carefully to avoid pulling or stretching the fabric. Removing the paper templates will help the quilt lay flat and prevent any bulging or puckering.
Step 6:
Press hexagon seams
After removing the paper templates, it’s time to press the hexagon seams. Here are the steps for pressing hexagon seams:
- Use an iron to press the seams of the hexagons.
- Press the seams towards one side or open, depending on personal preference and the quilt pattern.
- Hold the iron in place for a few seconds to set the seam.
- Repeat the process for all hexagons until all seams are pressed.
Pressing the seams will help the quilt lay flat and make it easier to quilt. It’s important to use a hot iron and press the seams carefully to avoid stretching or distorting the fabric. Take your time and make sure each seam is pressed thoroughly before moving on to the next one.
Step 7:
Repeat the process
After completing steps 4-6, it’s time to repeat the process until all hexagons are sewn together and the quilt top is complete. Here are some of the steps to repeat the process:
- Select two hexagons to sew together, aligning the points and edges as before.
- Pin the hexagons together and sew them along the edge.
- Remove the paper templates from the newly sewn hexagon.
- Press the seam flat.
- Repeat steps 1-4 until all hexagons are sewn together in the desired pattern and size.
It’s important to take your time and be patient as you repeat the process. Check the pattern frequently to ensure that the hexagons are being sewn together in the correct order. Don’t forget to press each seam as you go to ensure a neat and tidy finished product.
Step 8:
Finish the quilt
Once the quilt top is complete, it’s time to finish the quilt. Here are the steps for finishing the quilt:
- Cut a piece of batting and a piece of backing fabric slightly larger than the quilt top.
- Lay the backing fabric right side down on a flat surface.
- Put the batting on top of the backing fabric, smoothing out any wrinkles.
- Lay the quilt top right side up on top of the batting, making sure it is centred and straight.
- Pin or baste the three layers together to create the quilt sandwich.
- Quilt the layers together using a sewing machine or by hand.
- Once the quilting is complete, trim the edges of the quilt to remove excess batting and backing fabric.
- Create binding strips and attach them to the edges of the quilt, folding them over and stitching them in place.
- Finally, give the quilt a final press to smooth out any wrinkles and enjoy your finished product!
Finishing a quilt can take some time and effort, but the end result is well worth it. Take your time and be patient as you quilt the layers together and attach the binding. With a little care and attention, you’ll have a beautiful finished quilt to enjoy or give as a gift.
Conclusion
Machine sewing hexagons together is a fun and satisfying way to create a beautiful quilt top. By following the steps outlined above, you can create a stunning quilt that will be treasured for years to come. Remember to take your time, be precise, and enjoy the process!